
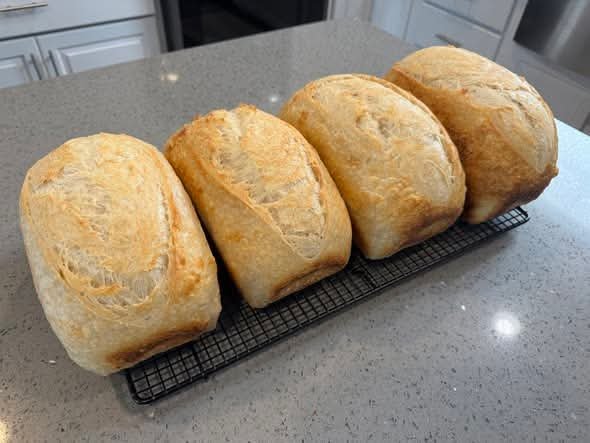
Soft Homemade Sourdough Sandwich Bread
There’s nothing quite like the smell of fresh bread baking in the oven. A homemade loaf brings warmth to the kitchen, fills the house with an irresistible aroma, and tastes far better than anything you’ll find at the grocery store. If you love the rich flavor of sourdough but prefer a soft loaf for sandwiches, this Sourdough Sandwich Bread Recipe is exactly what you need.
Unlike traditional artisan sourdough, which often has a thick crust and large open crumb, this recipe creates a light, fluffy loaf with a tender crust. It slices beautifully and is ideal for sandwiches, toast, grilled cheese, French toast, or simply spreading with butter while still slightly warm.
Made with an active sourdough starter, milk, butter, and honey, this bread stays soft for several days without using commercial yeast. Whether you’re just starting your sourdough journey or already bake regularly, this recipe is reliable, easy to follow, and sure to become one of your favorites.
Why You’ll Love This Recipe
There are plenty of reasons why this sourdough sandwich bread stands out.
- Soft and fluffy texture
- Mild sourdough flavor
- Perfect for sandwiches and toast
- No commercial yeast needed
- Easy enough for beginners
- Stays fresh for several days
- Freezer-friendly
- Great for meal prep
Every slice has the perfect balance of softness and chewiness while still offering the wonderful flavor that only natural sourdough fermentation can provide.
Recipe Information
Yield: 1 loaf
Prep Time: 20 minutes
Bulk Fermentation: 6–10 hours
Second Rise: 2–4 hours
Bake Time: 35–40 minutes
Total Time: Approximately 10–14 hours
Ingredients
- 100g active sourdough starter (fed and bubbly)
- 300g warm whole milk
- 30g honey
- 30g unsalted butter, softened
- 500g bread flour
- 10g fine sea salt
Equipment Needed
- Large mixing bowl
- Digital kitchen scale
- Dough scraper
- 9×5-inch loaf pan
- Plastic wrap or kitchen towel
- Cooling rack
Step-by-Step Instructions
Step 1: Mix the Dough
In a large mixing bowl, combine the active sourdough starter, warm milk, honey, and softened butter. Stir until mostly combined.
Add the bread flour and salt.
Mix everything until a rough, shaggy dough forms. Don’t worry if it looks slightly sticky—this is completely normal.
Step 2: Knead
Transfer the dough onto a lightly floured work surface.
Knead for 8–10 minutes until smooth, elastic, and soft.
If using a stand mixer with a dough hook, knead for about 6–8 minutes on medium speed.
The finished dough should feel soft and slightly tacky without sticking excessively.
Step 3: Rest
Place the dough back into the bowl.
Cover with plastic wrap or a clean towel and let it rest for 30 minutes.
This short rest helps the flour fully hydrate and makes the dough easier to handle.
Step 4: Bulk Fermentation
Leave the covered dough at room temperature until it becomes puffy and noticeably larger.
Approximate fermentation times:
- Warm kitchen: 6–8 hours
- Average room temperature: 8–10 hours
- Cool kitchen: 10–12 hours
Instead of watching the clock, watch the dough. It should look airy and expanded.
Step 5: Shape the Dough
Turn the dough onto a lightly floured surface.
Flatten it gently into a rectangle.
Roll it tightly into a loaf shape.
Pinch the seam closed and tuck the ends underneath.
Step 6: Final Rise
Grease a 9×5-inch loaf pan.
Place the shaped dough inside with the seam facing down.
Cover loosely and let it rise until the dough sits about 1 inch above the rim of the pan.
Depending on your kitchen temperature, this usually takes between 2 and 4 hours.
Step 7: Bake
Preheat the oven to 375°F (190°C).
Bake for 35–40 minutes until golden brown.
For best results, check the internal temperature with an instant-read thermometer.
The center should reach 200°F (93°C).
If the top browns too quickly, loosely cover it with aluminum foil during the last 10 minutes.
Step 8: Cool
Remove the loaf from the pan immediately after baking.
Place it on a cooling rack.
Allow it to cool completely before slicing.
Although it’s tempting to cut into warm bread, waiting helps the crumb finish setting and prevents a gummy texture.
Storage Tips
Store the cooled loaf inside an airtight container or bread bag at room temperature.
It stays soft for 3–4 days.
Avoid refrigerating homemade bread because it dries out much faster.
Freezing Instructions
Once the loaf has cooled completely, slice it.
Place the slices into a freezer-safe bag.
Freeze for up to 3 months.
Toast individual slices directly from frozen whenever needed.
Tips for the Best Sourdough Sandwich Bread
- Always use an active, bubbly starter.
- Measure ingredients using a digital kitchen scale.
- Don’t rush fermentation.
- Bread flour creates the softest texture.
- Cover the dough while rising.
- Cool completely before slicing.
- Use fresh flour for the best flavor.
Delicious Serving Ideas
This bread is incredibly versatile.
Enjoy it as:
- Peanut butter sandwiches
- Grilled cheese
- Avocado toast
- Garlic toast
- French toast
- Club sandwiches
- Breakfast toast with butter and jam
- Homemade croutons
- Bread pudding
- Turkey or chicken sandwiches
Troubleshooting
Bread Didn’t Rise?
Your starter may not have been active enough.
Always feed it several hours before baking until it’s bubbly and doubled in size.
Bread Is Dense?
Usually caused by under-fermentation.
Give the dough more time if your kitchen is cool.
Crust Too Thick?
Reduce baking time slightly or tent the loaf with foil during the last part of baking.
Bread Is Gummy?
Most likely it was sliced before cooling completely.
Allow at least one hour of cooling before cutting.
Frequently Asked Questions
Can I Use All-Purpose Flour?
Yes.
However, bread flour provides better gluten development, giving the loaf a softer and taller structure.
Can I Refrigerate the Dough Overnight?
Absolutely.
After shaping, cover the loaf and refrigerate overnight.
Allow it to sit at room temperature for about 30–60 minutes before baking if necessary.
Can I Double the Recipe?
Yes.
Simply double all ingredients and divide the dough between two loaf pans.
Is Commercial Yeast Needed?
No.
The sourdough starter provides all the natural fermentation needed for this recipe.
Final Thoughts
If you’re searching for the perfect everyday bread, this Sourdough Sandwich Bread Recipe is an excellent choice. It combines the rich, slightly tangy flavor of traditional sourdough with the soft, fluffy texture everyone loves for sandwiches and toast.
The loaf is easy to prepare, freezes beautifully, and stays fresh for days, making it ideal for busy families or anyone who enjoys homemade bread throughout the week.
Once you bake this recipe, you’ll discover just how satisfying it is to slice into a loaf you’ve made from scratch. Whether you’re preparing breakfast toast, lunch sandwiches, or a comforting grilled cheese dinner, this bread delivers incredible flavor and texture every single time.
Happy Baking! 🍞❤️
