
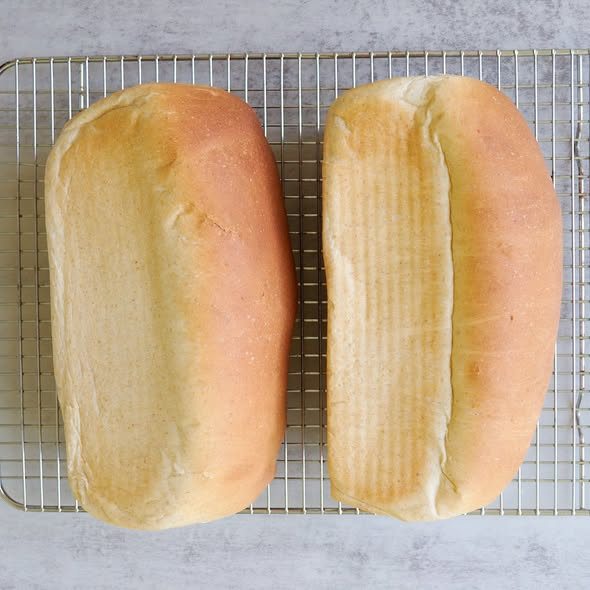
There is nothing quite like the smell of freshly baked bread filling the kitchen. This Soft Homemade Sandwich Bread is tender, fluffy, lightly golden on the outside, and perfect for everyday sandwiches, toast, breakfast, or simply enjoying with a little butter. If you have been looking for a homemade bread recipe that produces a soft loaf with a beautiful texture, this is one worth saving.
Unlike many store-bought breads, homemade bread allows you to control exactly what goes into the dough. The result is a fresh loaf with a soft crumb and a delicious homemade flavor. It also freezes well, making it a practical recipe for busy weeks.
Why You’ll Love This Homemade Bread
This sandwich bread has a wonderfully soft texture without being overly sweet. The dough is easy to work with, and once baked, the loaf slices beautifully.
It is ideal for:
- Breakfast toast
- Sandwiches
- Grilled cheese
- French toast
- Lunchbox sandwiches
- Bread and butter
- Homemade croutons
The secret to a soft loaf is giving the dough enough time to develop properly and allowing it to rise until it becomes light and airy.
Ingredients
For the Bread
- 3 cups all-purpose or bread flour
- 2 ¼ teaspoons active dry yeast
- 2 tablespoons granulated sugar
- 1 teaspoon salt
- 1 cup warm milk
- 2 tablespoons melted butter
- 1 large egg
- 2–3 tablespoons warm water, if needed
For the Top
- 1 tablespoon melted butter
How to Make Soft Sandwich Bread
Step 1: Activate the Yeast
Start by adding the warm milk to a large mixing bowl. The milk should feel warm but not hot. Add the sugar and active dry yeast.
Stir gently and allow the mixture to sit for about 5–10 minutes.
If the yeast is active, you should see a light layer of foam developing on the surface. This is a good indication that the yeast is ready to use.
If your yeast does not foam, check that the milk was not too hot or too cold and that your yeast is still active.
Step 2: Make the Dough
Add the melted butter and egg to the yeast mixture. Stir until combined.
Gradually add the flour and salt. Mix until a rough dough begins to form.
The dough should be soft and slightly tacky, but it should not be extremely sticky. If it feels too wet, add a little flour, one tablespoon at a time. If it feels dry, add a small amount of warm water.
Avoid adding too much flour because this can make the finished bread dense instead of soft.
Step 3: Knead the Dough
Transfer the dough to a lightly floured surface and knead for approximately 8–10 minutes.
You can also use a stand mixer fitted with a dough hook and knead on low to medium speed until the dough becomes smooth and elastic.
A properly kneaded dough should feel soft and stretchy. When you gently pull a small piece between your fingers, it should stretch without immediately tearing.
This is one of the most important steps for creating a soft, fluffy sandwich loaf.
Step 4: First Rise
Place the kneaded dough into a lightly greased bowl.
Cover the bowl with plastic wrap or a clean kitchen towel and place it somewhere warm.
Allow the dough to rise for approximately 1–2 hours, or until it has doubled in size.
The exact time will depend on the temperature of your kitchen. A warmer environment will usually make the dough rise faster, while a cooler kitchen may require more time.
Do not rely only on the clock. Look at the dough and wait until it has visibly increased in size.
Step 5: Shape the Loaf
Once the dough has doubled, gently press it down to release excess air.
Transfer it to your work surface and shape it into a rectangle.
Roll the dough tightly into a log, starting from one short side. Pinch the seam gently to seal it.
Place the shaped dough into a greased loaf pan with the seam facing down.
Make sure the dough fits comfortably inside the pan and has enough room to rise.
Step 6: Second Rise
Cover the loaf pan loosely and allow the dough to rise again for approximately 30–60 minutes.
The dough should become noticeably puffy and should rise close to the top of the loaf pan.
This second rise helps create the soft, airy texture that makes homemade sandwich bread so delicious.
Avoid letting the dough rise too far, because over-proofing can cause the loaf to collapse during baking.
Step 7: Bake
Preheat your oven to 350°F (175°C).
Once the dough has finished its second rise, place the loaf in the preheated oven.
Bake for approximately 25–35 minutes, or until the top is beautifully golden brown and the loaf sounds hollow when gently tapped.
If the top begins browning too quickly, loosely cover it with aluminum foil during the final part of baking.
Step 8: Add Butter
As soon as the bread comes out of the oven, brush the top with melted butter.
This simple step gives the crust a soft texture and adds a delicious buttery finish.
Allow the bread to cool in the pan for about 10 minutes, then carefully remove it and place it on a wire rack.
The Most Important Step: Let It Cool
It can be tempting to slice homemade bread immediately, but try to wait until the loaf has cooled sufficiently.
Cutting bread while it is still extremely hot can compress the soft interior and make the slices appear gummy.
Allow the loaf to cool for at least 30–60 minutes before slicing.
Once cooled, use a sharp serrated bread knife to create clean slices.
How to Store Homemade Sandwich Bread
Store the cooled bread in an airtight container or bread bag at room temperature.
For the best texture, enjoy it within several days.
You can also freeze the loaf. Slice the bread first, place parchment paper between the slices if desired, and store them in a freezer-safe bag.
When you need bread, simply remove individual slices and toast them directly from frozen.
Helpful Tips for Perfect Bread
Use warm, not hot, milk. Extremely hot liquid can damage the yeast.
Don’t add too much flour. A slightly soft dough generally produces a softer loaf.
Give the dough enough time to rise. Rising time depends on your kitchen temperature, so watch the dough rather than following the clock alone.
Knead properly. Good gluten development helps the loaf become stretchy and fluffy.
Don’t slice immediately. Cooling allows the interior to finish setting.
Measure flour correctly. For the most consistent results, weighing flour with a kitchen scale is ideal. If using cups, spoon the flour into the measuring cup and level it rather than packing it down.
Serving Ideas
Fresh homemade sandwich bread is incredibly versatile. Use it to make turkey and cheese sandwiches, grilled cheese, chicken sandwiches, egg sandwiches, or simple buttered toast.
For breakfast, toast a slice and top it with butter and jam, peanut butter, honey, or your favorite spread.
You can also use leftover slices to make French toast or homemade breadcrumbs.
Final Thoughts
Making homemade sandwich bread is easier than it may seem. With a few simple ingredients, proper kneading, and enough time for the dough to rise, you can create a loaf that is soft, fluffy, golden, and perfect for everyday meals.
The freshly baked aroma alone makes this recipe worth trying. Once you get comfortable with the process, homemade bread can become a regular part of your kitchen routine.
Save this recipe and give it a try the next time you want soft, fresh sandwich bread straight from your own oven!
