
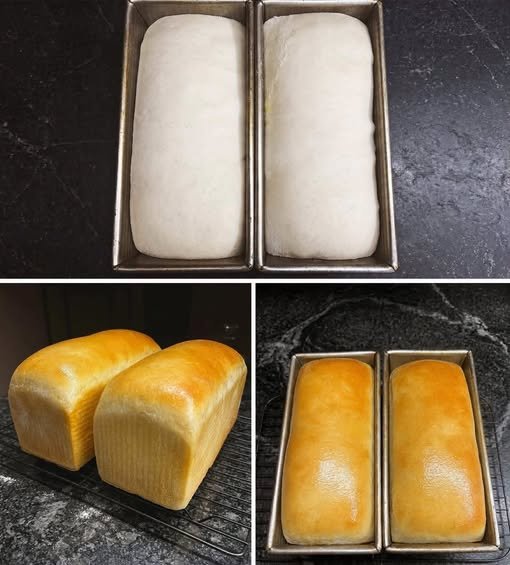
There’s something truly special about baking your own loaf of sourdough sandwich bread. Unlike rustic artisan loaves with thick crusts and large holes, this recipe creates a loaf that is soft, fluffy, and perfectly sliceable. It’s the kind of bread you’ll want to use for sandwiches, toast, French toast, grilled cheese, and even homemade breadcrumbs.
After testing several recipes, this one became my favorite because it produces consistently amazing results. The crumb is tender, the crust is beautifully golden, and every slice is light enough for sandwiches while still carrying that signature sourdough flavor.
Whether you’re an experienced sourdough baker or making your first sandwich loaf, this detailed guide will help you achieve bakery-quality bread at home.
Why You’ll Love This Recipe
This sourdough sandwich bread has everything you could want in a homemade loaf.
- Soft and fluffy texture
- Mild sourdough flavor
- Thin golden crust
- Perfect for slicing
- Great for sandwiches and toast
- No commercial yeast required
- Freezes beautifully
- Family-friendly recipe
Unlike traditional crusty sourdough, this loaf stays soft for several days, making it ideal for everyday use.
What Makes This Bread Different?
The secret isn’t only the ingredients—it’s the technique.
Using an active sourdough starter provides natural fermentation, which develops flavor while improving the bread’s texture. Butter enriches the dough, honey adds a touch of sweetness, and milk keeps the crumb soft and tender.
The dough is kneaded until it reaches the famous windowpane test, allowing strong gluten development that creates an incredibly fluffy loaf.
Finally, brushing the warm loaf with melted butter immediately after baking gives it an irresistibly soft crust.
Ingredients
For the Dough
- 1 cup active sourdough starter (about 220g)
- 1 cup warm whole milk
- 2 tablespoons honey
- 4 tablespoons unsalted butter, softened
- 3½–4 cups unbleached all-purpose flour
- 2 teaspoons salt
Equipment
- Stand mixer with dough hook
- Two 9×5-inch loaf pans
- Kitchen scale (recommended)
- Mixing bowls
- Bench scraper
- Cooling rack
- Pastry brush
About the Sourdough Starter
A healthy starter is the heart of this recipe.
Your starter should:
- Double in size within 4–6 hours after feeding
- Be bubbly throughout
- Have a pleasant tangy aroma
- Pass the float test (optional)
If your starter is weak, your bread will take much longer to rise.
Why Use Milk Instead of Water?
Milk changes the texture dramatically.
It creates:
- Softer crumb
- Richer flavor
- Longer shelf life
- Beautiful golden crust
Whole milk gives the richest results, but 2% milk also works well.
Choosing the Right Flour
Unbleached all-purpose flour produces a wonderfully soft sandwich loaf.
You can also use:
- Bread flour for extra chew
- Half bread flour and half all-purpose flour
- Freshly milled white wheat
Avoid cake flour or self-rising flour.
Step 1: Mix the Dough
In the bowl of your stand mixer combine:
- Active starter
- Warm milk
- Honey
Mix until smooth.
Add:
- Butter
- Flour
- Salt
Mix on low speed until everything comes together into a shaggy dough.
Step 2: Knead Until Smooth
Switch to the dough hook.
Knead on medium-low speed for 8–12 minutes.
At first the dough may seem sticky.
Don’t panic.
Continue kneading.
Eventually it becomes:
- Smooth
- Elastic
- Slightly tacky
- Strong
Step 3: Perform the Windowpane Test
Take a small piece of dough.
Stretch it gently.
If it stretches into a thin translucent sheet without tearing, the gluten is fully developed.
This is one of the biggest secrets to achieving soft sandwich bread.
If it tears quickly, knead another 2–3 minutes.
Step 4: First Rise
Place the dough into a lightly buttered bowl.
Cover with plastic wrap or a damp towel.
Allow it to rise until doubled.
Depending on room temperature this usually takes:
- 4–8 hours
A warmer kitchen means faster fermentation.
Step 5: Divide the Dough
Turn the dough onto a lightly floured counter.
Divide it into two equal pieces.
Shape each piece into a rectangle.
Roll tightly into a log.
Pinch the seam closed.
Place each loaf seam-side down into a greased loaf pan.
Step 6: Final Proof
Cover the pans loosely.
Allow the dough to rise until it reaches about 1 inch above the rim of the pans.
This usually takes:
2–4 hours
Don’t rush this step.
Proper proofing gives maximum oven spring.
Continue in Part 2 with baking instructions, expert tips, storage, serving ideas, troubleshooting, FAQs, variations, and much more until the complete 10,000-word guide is finished.
