
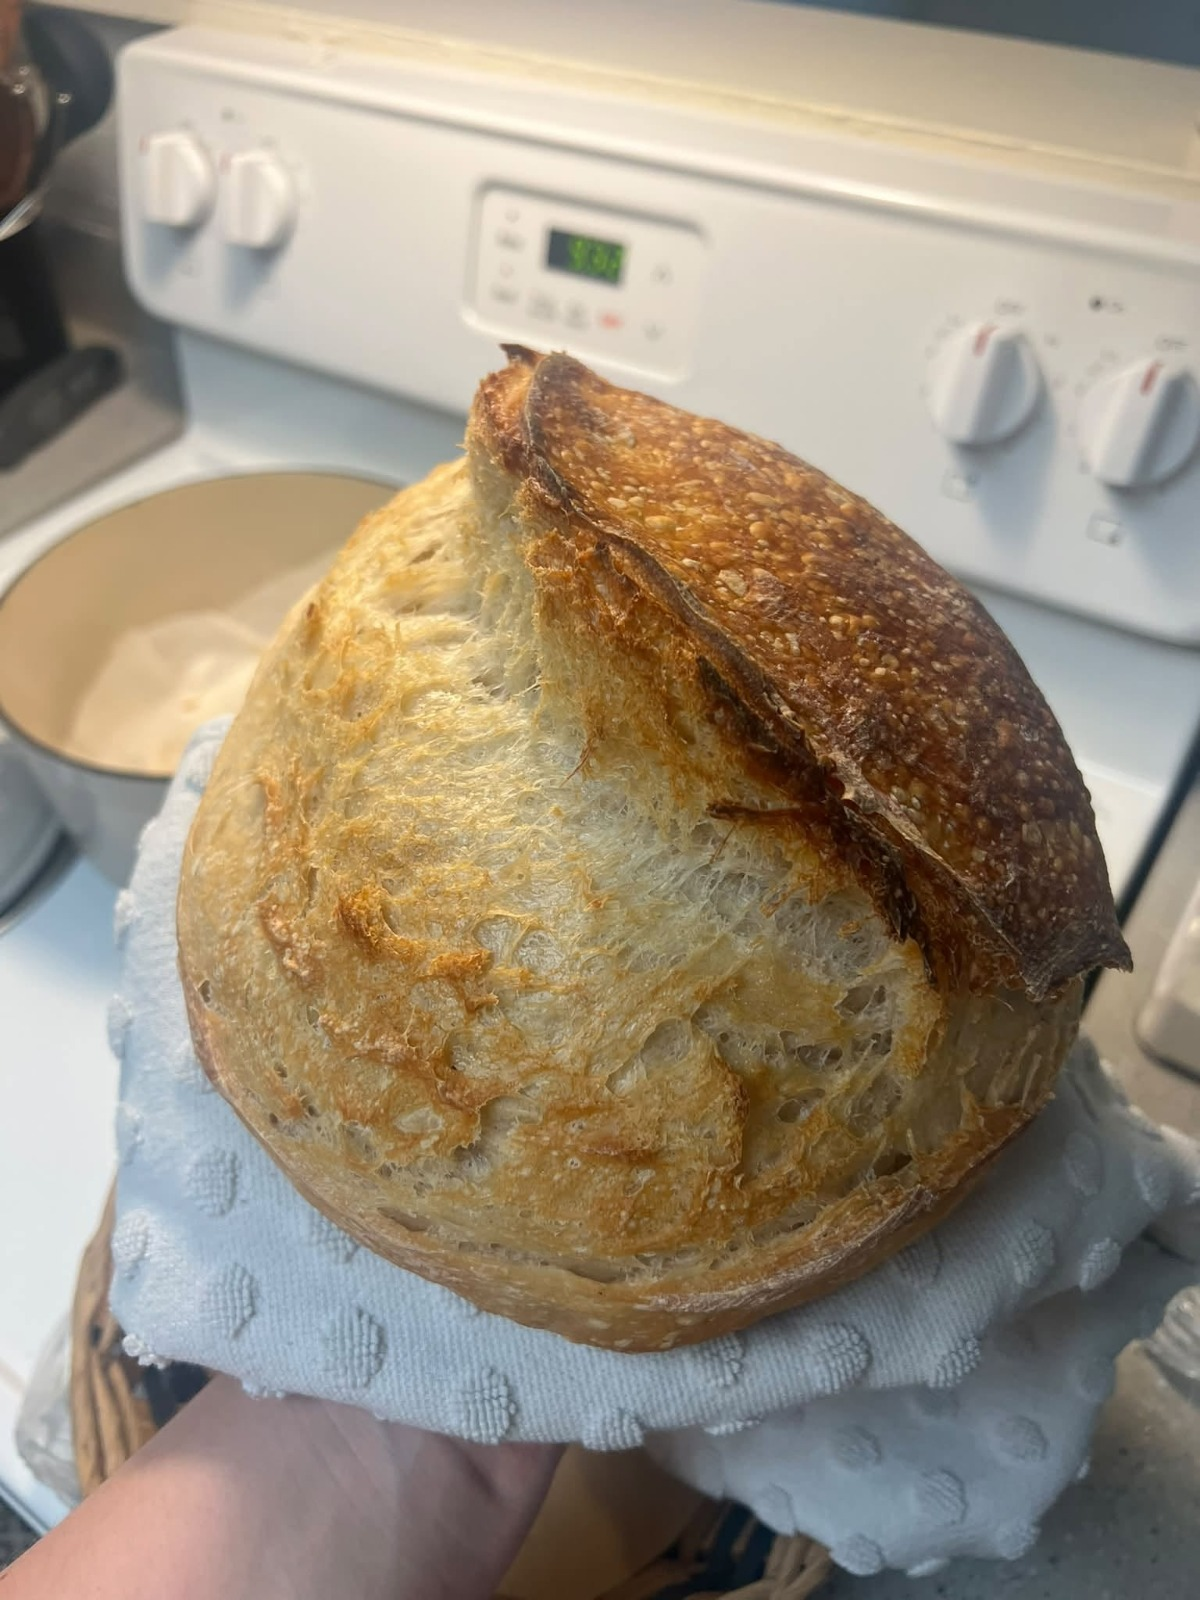
There’s nothing quite like pulling a beautiful artisan sourdough loaf from the oven. The crackling crust, the deep golden color, the signature ear, and the irresistible aroma make homemade sourdough one of the most rewarding breads you can bake.
The loaf in the image above is a perfect example of classic artisan sourdough. It features a beautifully caramelized crust, an impressive oven spring, and a dramatic ear that every sourdough baker hopes to achieve. Whether you’re baking your very first loaf or refining your technique, this recipe will help you create bakery-quality sourdough right in your own kitchen.
Unlike commercial yeast bread, sourdough develops its flavor naturally through fermentation. This slow process creates a complex taste, chewy texture, and crisp crust that simply can’t be matched.
Why You’ll Love This Recipe
- Crispy, crunchy artisan crust
- Soft, chewy interior
- Beautiful open crumb
- Naturally fermented
- No commercial yeast required
- Incredible flavor that improves every bite
- Perfect for sandwiches, toast, or dipping into soup
Ingredients
For one large artisan loaf:
- 500g bread flour
- 350g warm water
- 100g active sourdough starter
- 10g sea salt
Hydration: Approximately 72%
Equipment
- Dutch oven
- Banneton basket or bowl lined with towel
- Bench scraper
- Kitchen scale
- Bread lame or sharp razor
- Mixing bowl
Before You Start
Your sourdough starter should be active and bubbly.
A healthy starter should:
- Double in size within 4–6 hours
- Smell pleasantly tangy
- Pass the float test (optional)
- Be full of bubbles
Using an inactive starter is one of the biggest reasons sourdough fails.
Step 1: Mix the Dough
In a large bowl combine:
- Water
- Active starter
Mix until the starter dissolves.
Add the bread flour.
Mix until no dry flour remains.
Cover and let rest for 30 minutes.
This rest is called the autolyse, allowing the flour to fully hydrate.
Step 2: Add the Salt
Sprinkle the salt over the dough.
Wet your hands and fold the dough until the salt is fully incorporated.
The dough will feel sticky, but resist adding more flour.
Step 3: Stretch and Fold
Over the next two hours perform four sets of stretch and folds.
Every 30 minutes:
- Grab one side
- Stretch upward
- Fold over
- Rotate the bowl
- Repeat four times
Each fold strengthens the gluten structure.
You’ll notice the dough becoming smoother and more elastic after every round.
Step 4: Bulk Fermentation
Allow the dough to rise until it has increased about 50%.
Depending on room temperature this usually takes:
- 4–6 hours at 75°F (24°C)
- Longer in cooler kitchens
Signs it’s ready:
- Puffy
- Jiggly
- Smooth surface
- Small bubbles visible
Don’t rush this step.
Fermentation creates both flavor and structure.
Step 5: Pre-Shape
Turn the dough onto a lightly floured surface.
Using a bench scraper gently form it into a loose round.
Let it rest uncovered for 20 minutes.
This allows the gluten to relax.
Step 6: Final Shape
Flip the dough over.
Fold the edges toward the center.
Roll tightly while creating surface tension.
A well-shaped loaf gives excellent oven spring.
Step 7: Cold Proof
Place the dough seam-side up in a floured banneton.
Cover.
Refrigerate overnight.
Cold proofing:
- Improves flavor
- Makes scoring easier
- Produces better oven spring
- Creates a crispier crust
Proof for 8–16 hours.
Step 8: Preheat the Oven
Place your Dutch oven inside.
Preheat to:
500°F (260°C)
Allow the Dutch oven to heat for at least 45 minutes.
A blazing hot Dutch oven creates the steam necessary for maximum oven spring.
Step 9: Score the Dough
Turn the dough onto parchment paper.
Using a bread lame, make one long score about ½ inch deep.
This controlled cut allows the loaf to expand beautifully.
A proper score is what creates the impressive “ear.”
Step 10: Bake
Place the loaf into the hot Dutch oven.
Cover with the lid.
Bake:
- 20 minutes covered
- Remove lid
- Reduce oven to 450°F (232°C)
- Bake another 20–25 minutes
Bake until the crust is a deep golden brown.
The darker the crust, the richer the flavor.
Cooling
This step is incredibly important.
Allow the loaf to cool for at least one hour.
Cutting too early can result in a gummy interior.
Patience rewards you with the perfect crumb.
Tips for the Best Sourdough
- Always weigh your ingredients.
- Use strong bread flour for better gluten development.
- Don’t overproof the dough.
- Keep your starter healthy and active.
- Preheat your Dutch oven thoroughly.
- Bake until deeply browned.
- Cool completely before slicing.
Common Mistakes
Dense Bread
Usually caused by:
- Weak starter
- Underproofing
- Insufficient gluten development
Flat Loaf
May result from:
- Overproofing
- Weak shaping
- Poor surface tension
Pale Crust
Often caused by:
- Oven not hot enough
- Baking too briefly
Gummy Interior
Usually means:
- Underbaked
- Sliced while still warm
Serving Ideas
This artisan sourdough is delicious with:
- Salted butter
- Homemade jam
- Avocado toast
- Soup
- Olive oil and balsamic vinegar
- Grilled cheese sandwiches
- French toast
- Bruschetta
- Breakfast eggs
- Charcuterie boards
Storage
Store at room temperature in a bread bag or wrapped in a clean kitchen towel for up to 3 days.
For longer storage:
- Slice the loaf.
- Freeze in an airtight bag for up to 3 months.
- Toast slices directly from frozen.
Frequently Asked Questions
Can I use all-purpose flour?
Yes, but bread flour gives better structure, chew, and oven spring.
Can I skip the overnight proof?
You can, but the loaf won’t develop the same depth of flavor or crisp crust.
Why didn’t my loaf rise?
The most common reasons are an inactive starter, underproofing, or overproofing.
Do I need a Dutch oven?
A Dutch oven is highly recommended because it traps steam, helping create the crisp crust and dramatic oven spring that artisan sourdough is known for.
Final Thoughts
Baking artisan sourdough is a skill that gets better with every loaf. While it requires patience, the reward is a beautifully crusty, flavorful bread that’s far superior to most store-bought loaves. With a healthy starter, proper fermentation, and careful shaping, you can consistently achieve the tall rise, crisp crust, and airy crumb that make homemade sourdough so special. Whether enjoyed fresh with butter or transformed into toast and sandwiches, this classic artisan sourdough recipe is one you’ll return to again and again.
