
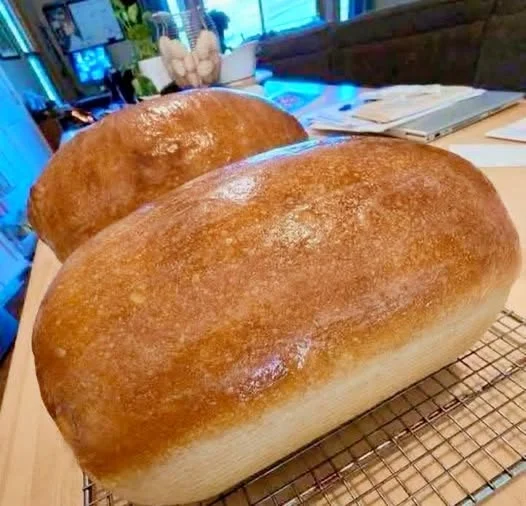
🍞 Sourdough Bread Recipe – Crispy Crust, Soft Interior & Incredible Flavor
Nothing compares to the aroma of freshly baked sourdough bread filling your kitchen. With its crisp golden crust, chewy texture, and rich tangy flavor, sourdough has become one of the most loved artisan breads around the world. Unlike regular bread that relies on commercial yeast, sourdough is naturally leavened using a fermented sourdough starter. The result is bread with deeper flavor, better texture, and a beautiful rustic appearance.
Although baking sourdough may seem intimidating at first, it becomes surprisingly simple once you understand the process. This recipe is designed for beginners and home bakers who want to create bakery-style bread using simple ingredients and easy-to-follow steps.
Whether you’re making toast for breakfast, sandwiches for lunch, or serving warm slices alongside soup, this homemade sourdough loaf will quickly become a favorite in your kitchen.
❤️ Why You’ll Love This Recipe
There are many reasons why home bakers fall in love with sourdough bread:
- Crispy artisan-style crust
- Soft, airy, chewy crumb
- Naturally fermented for incredible flavor
- No commercial yeast required
- Perfect for sandwiches or toast
- Freezes beautifully
- Great recipe for beginners
Once you bake your first successful loaf, you’ll want to make it again and again.
🧂 Ingredients
You’ll only need a few basic ingredients.
- 100g active sourdough starter
- 375g warm water (75–80°F / 24–27°C)
- 450g bread flour
- 50g whole wheat flour
- 10g fine sea salt
Using a healthy, bubbly sourdough starter is the key to achieving a beautiful rise and an open crumb.
🧰 Equipment Needed
Having the right tools makes sourdough baking much easier.
- Digital kitchen scale
- Large mixing bowl
- Dough scraper
- Banneton basket or bowl lined with a towel
- Bread lame or sharp razor
- Dutch oven with lid
- Cooling rack
While special equipment helps, you can still bake excellent bread using items you already have in your kitchen.
👩🍳 Step-by-Step Instructions
Step 1: Prepare the Levain
If your starter has been refrigerated, feed it several hours before mixing your dough.
Combine:
- 20g sourdough starter
- 100g water
- 100g bread flour
Mix well and let it sit at room temperature until doubled in size and full of bubbles. Depending on the temperature, this usually takes about 4–6 hours.
A strong, active levain is essential for good fermentation.
Step 2: Mix the Dough
In a large bowl, combine:
- Bread flour
- Whole wheat flour
- Warm water
Mix until no dry flour remains. The dough will look rough and shaggy.
Cover and let the dough rest for 30–60 minutes. This step is called autolyse, which helps the flour absorb water and strengthens gluten naturally.
Step 3: Add Starter and Salt
Add the active levain to the dough.
Mix thoroughly until incorporated.
After resting for another 30 minutes, sprinkle in the salt along with a small splash of water.
Continue mixing until the dough becomes smooth and evenly combined.
Step 4: Bulk Fermentation
Allow the dough to ferment for about 4–6 hours at room temperature.
During the first 2–3 hours, perform a series of stretch-and-folds every 30 minutes.
To stretch and fold:
- Grab one side of the dough.
- Stretch upward.
- Fold it over itself.
- Rotate the bowl.
- Repeat on all four sides.
Each fold strengthens the dough without kneading.
By the end of fermentation, the dough should:
- Rise by about 30–50%
- Feel soft and airy
- Have bubbles throughout
- Jiggle slightly when shaken
Step 5: Shape the Dough
Lightly flour your work surface.
Turn the dough out and gently shape it into a loose round.
Allow it to rest for 20 minutes.
After resting, perform the final shaping by creating tension across the surface of the dough.
Place it seam-side up into a floured banneton basket.
Rice flour works especially well because it prevents sticking.
Step 6: Cold Proof Overnight
Cover the banneton with plastic wrap or a reusable cover.
Refrigerate for 12–16 hours.
Cold fermentation develops the signature sourdough flavor while making scoring easier before baking.
Step 7: Bake
About 45 minutes before baking, place your Dutch oven into the oven.
Preheat to 475°F (245°C).
Carefully transfer the dough onto parchment paper.
Score the top using a bread lame or sharp razor.
Place it inside the hot Dutch oven.
Bake:
- 25 minutes with the lid on
- Remove the lid
- Lower temperature to 450°F (232°C)
- Bake another 20–25 minutes
The loaf should have a rich golden-brown crust.
Step 8: Cool Before Slicing
This is one of the hardest parts—but also one of the most important.
Allow the bread to cool completely for at least 3–4 hours.
Cutting into hot sourdough traps steam inside and results in a gummy texture.
Patience rewards you with a perfectly set crumb.
💡 Expert Tips for Success
- Always use an active starter that doubles within 4–6 hours.
- Weigh ingredients instead of measuring by cups.
- Avoid adding extra flour during mixing.
- Do not rush fermentation.
- Use a preheated Dutch oven for maximum oven spring.
- Let the loaf cool completely before slicing.
- Practice shaping to build surface tension.
Small improvements in technique make a huge difference in the final loaf.
🍽 Serving Suggestions
Fresh sourdough bread is incredibly versatile.
Enjoy it:
- Toasted with butter
- With homemade jam
- Alongside soups
- Served with pasta
- For grilled cheese sandwiches
- With olive oil and balsamic vinegar
- As avocado toast
- For breakfast eggs
It also makes amazing French toast the next day.
🥡 Storage Tips
Store cooled bread in a paper bag or bread box for up to 3 days.
Avoid refrigerating, as it dries out the bread.
For longer storage:
- Slice the loaf.
- Freeze in a zip-top freezer bag.
- Toast slices directly from frozen.
Frozen sourdough stays fresh for up to 3 months.
❓ Frequently Asked Questions
Why didn’t my sourdough rise?
Your starter may not have been active enough. Feed it regularly until it consistently doubles in size before baking.
Why is my bread dense?
Dense bread usually results from under-fermentation, over-handling, or a weak starter.
Why is my crust too thick?
A thick crust can happen if the bread is baked too long or without enough steam during the first part of baking.
Can I skip the overnight cold proof?
Yes, but your bread won’t develop as much flavor and may be harder to score cleanly.
Can beginners make sourdough?
Absolutely. It takes patience more than experience. After a few loaves, the process becomes much easier.
🔥 Final Thoughts
Homemade sourdough bread is one of the most rewarding baking projects you can try. With just flour, water, salt, and an active starter, you can create a beautiful artisan loaf that rivals those from professional bakeries.
The crispy crust, chewy interior, and rich fermented flavor make every slice worth the time and effort. As you continue baking, you’ll become more comfortable reading your dough and adjusting the process to suit your kitchen.
If this recipe helped you bake a delicious loaf of sourdough bread, thank you for visiting! Feel free to share it with friends and family, and happy baking!
