
Prep Time: 30 minutes
Rest & Fermentation: 12–16 hours
Bake Time: 40–45 minutes
Total Time: 13–17 hours
Yield: 3 Mini Loaves
Difficulty: Intermediate
Mini Sourdough Bread Loaf Recipe
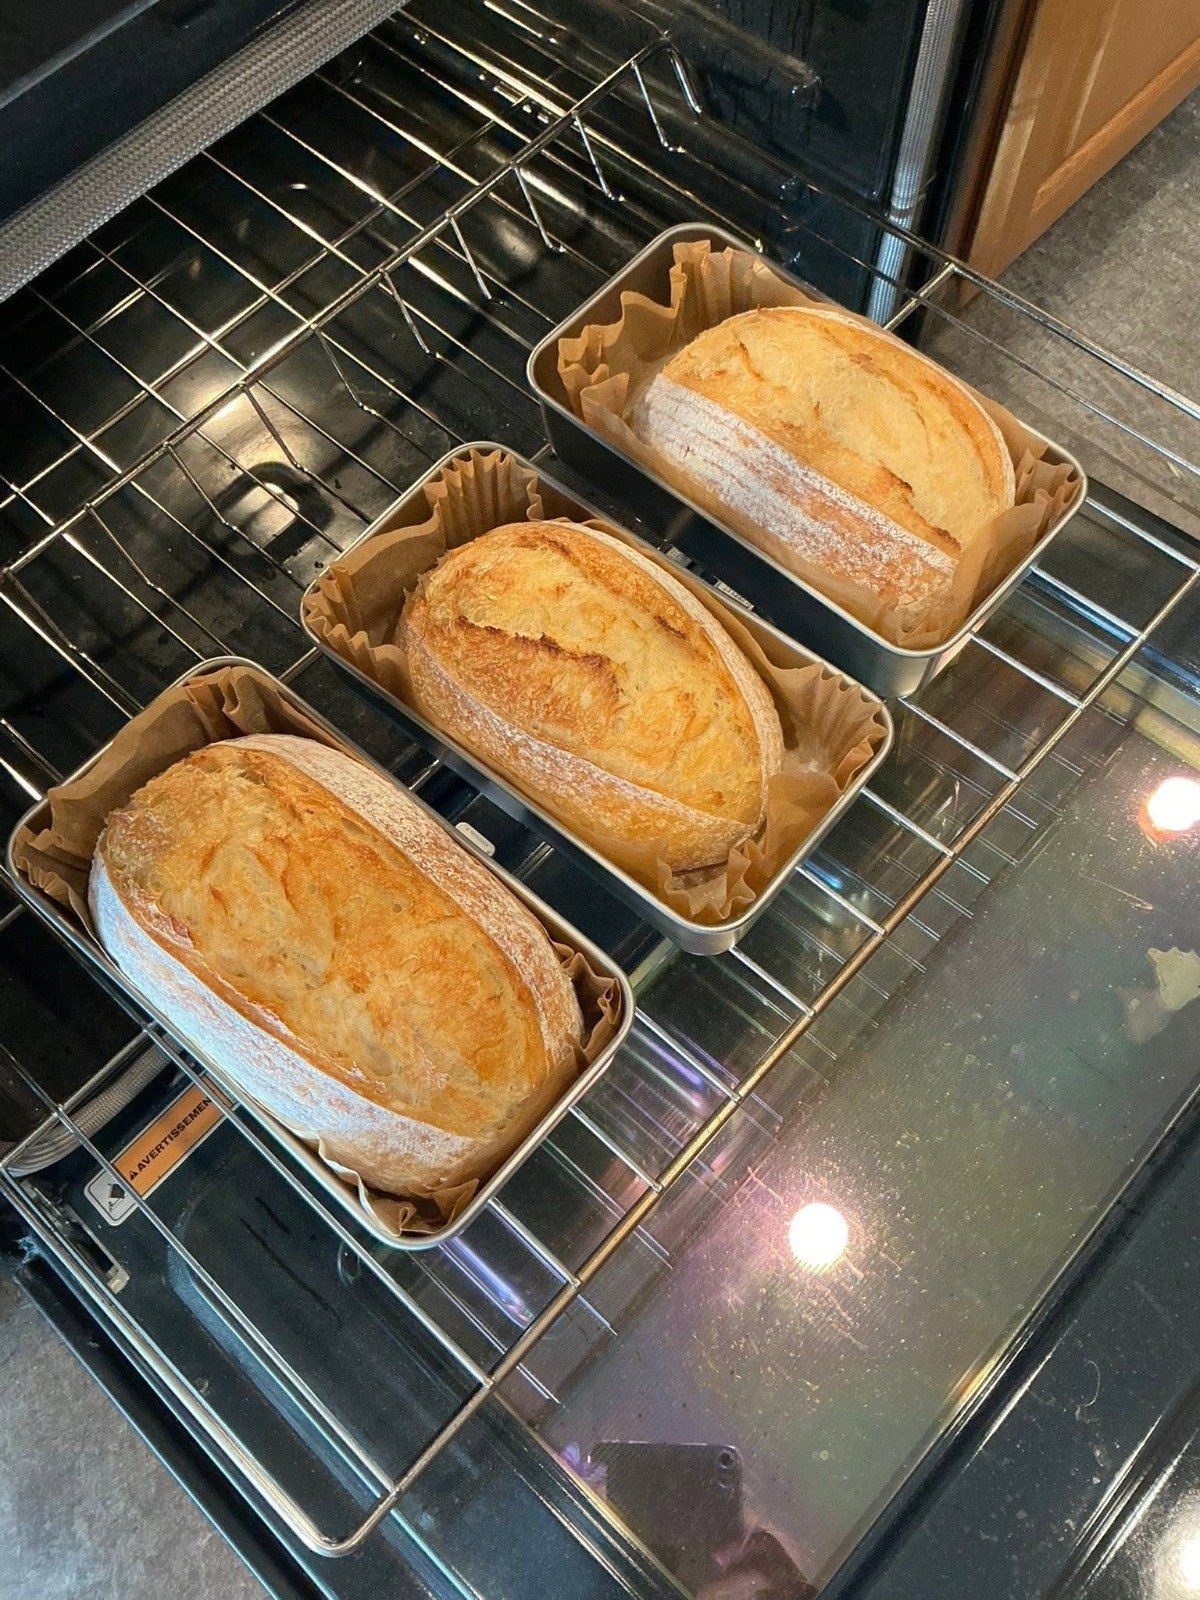
There’s something incredibly satisfying about baking your own sourdough bread, especially when it comes in adorable mini loaf pans. These Mini Sourdough Bread Loaves are the perfect combination of rustic artisan bread and practical everyday baking. They have a beautifully crisp golden crust, a soft and chewy interior, and the rich tangy flavor that only naturally fermented sourdough can provide.
Mini loaves are ideal for small families, gifting, meal prep, or freezing for later. Unlike large artisan boules, these smaller loaves bake more evenly, cool faster, and are easier to slice for sandwiches, toast, or serving alongside soups and salads.
This recipe uses an active sourdough starter and requires slow overnight fermentation, allowing natural yeast to develop incredible flavor while improving texture and digestibility. Although sourdough requires patience, most of the time is completely hands-off.
Whether you’re an experienced baker or making sourdough for the first time, these mini loaves are a wonderful project that rewards you with bakery-quality bread right from your own kitchen.
Why You’ll Love This Recipe
- Crispy golden artisan crust
- Soft, airy, chewy interior
- Perfect size for sandwiches
- Freezer-friendly
- Naturally fermented
- No commercial yeast needed
- Great for gifting
- Beautiful bakery-style appearance
Ingredients
For the Dough
- 500g bread flour
- 350g water (room temperature)
- 100g active sourdough starter
- 10g salt
Equipment
- 3 mini loaf pans
- Mixing bowl
- Kitchen scale
- Dough scraper
- Bench scraper
- Parchment paper
- Sharp bread lame or razor blade
- Plastic wrap or bowl cover
- Cooling rack
Step 1: Feed Your Starter
Your sourdough starter should be bubbly, active, and doubled in size before mixing the dough.
A healthy starter usually reaches its peak about 4–6 hours after feeding depending on room temperature.
A strong starter is the key to getting beautiful oven spring and an airy crumb.
Step 2: Mix the Dough
In a large bowl combine:
- Water
- Active sourdough starter
Mix until the starter dissolves.
Add the bread flour and stir until no dry flour remains.
The dough will look rough and shaggy.
Cover the bowl and let it rest for 30 minutes.
This process is called the autolyse and helps gluten develop naturally.
Step 3: Add Salt
Sprinkle the salt over the dough.
Wet your hands slightly and gently fold the salt into the dough until fully incorporated.
The dough will become smoother after a few minutes.
Step 4: Stretch and Fold
During the first two hours of fermentation, perform four sets of stretch and folds.
Every 30 minutes:
- Lift one side of the dough.
- Stretch upward.
- Fold over itself.
- Rotate the bowl.
- Repeat four times.
You’ll notice the dough becoming smoother, stronger, and more elastic after every fold.
Step 5: Bulk Fermentation
Cover the bowl and let the dough ferment until it rises approximately 50%.
Depending on temperature, this usually takes:
- 4–6 hours at 75°F (24°C)
- Longer in cooler kitchens
The dough should appear puffy with small bubbles around the edges.
Avoid waiting until it doubles completely, as over-proofing can weaken the dough.
Step 6: Divide the Dough
Transfer the dough onto a lightly floured work surface.
Using a bench scraper, divide into three equal pieces.
Each piece will weigh approximately 315–320 grams.
Shape each into a loose ball.
Let them rest uncovered for 20 minutes.
This bench rest relaxes the gluten, making final shaping easier.
Step 7: Final Shaping
Flatten each dough ball gently.
Fold both sides inward.
Roll tightly into a loaf shape.
Pinch the seam closed.
Place each loaf seam-side down into a parchment-lined mini loaf pan.
Step 8: Cold Proof
Cover the pans loosely.
Refrigerate overnight for 8–12 hours.
Cold fermentation develops the signature sourdough flavor while making the dough easier to score.
Step 9: Preheat the Oven
The next day, preheat your oven to:
450°F (230°C)
If using a baking stone, place it inside while preheating.
Steam during the first part of baking helps create a thin, crisp crust.
Place a tray on the bottom rack if you plan to add hot water for steam.
Step 10: Score the Dough
Remove the loaves from the refrigerator.
Dust lightly with flour.
Using a bread lame or sharp razor blade, make one long slash across the top of each loaf.
The score allows controlled expansion while baking.
Step 11: Bake
Bake with steam for:
20 minutes
Remove the steam tray.
Continue baking another:
20–25 minutes
The loaves are finished when:
- Deep golden brown
- Internal temperature reaches 205–210°F (96–99°C)
- Crust feels firm and crisp
Step 12: Cool
Transfer the loaves onto a cooling rack.
Allow them to cool for at least one hour before slicing.
Although tempting, cutting too early can make the crumb gummy.
Cooling allows the interior to finish setting.
Tips for Perfect Mini Sourdough Loaves
- Always use an active starter.
- Weigh ingredients for accuracy.
- Don’t rush fermentation.
- Avoid over-proofing.
- Score confidently.
- Bake until deeply golden.
- Cool completely before slicing.
- Store in a paper bag rather than plastic for a crisp crust.
Flavor Variations
Customize your loaves by adding:
- Fresh rosemary
- Roasted garlic
- Cheddar cheese
- Jalapeños
- Everything bagel seasoning
- Parmesan
- Dried cranberries
- Walnuts
- Cinnamon and raisins
- Mixed seeds
Fold mix-ins into the dough during the final stretch-and-fold.
Serving Ideas
These mini loaves pair wonderfully with:
- Butter and honey
- Homemade jam
- Avocado toast
- Soup
- Pasta
- Sandwiches
- French toast
- Garlic bread
- Bruschetta
- Cheese boards
Storage
Store at room temperature in a bread bag or wrapped in a clean kitchen towel for up to 3 days.
For longer storage, freeze the cooled loaves in freezer-safe bags for up to 3 months. Thaw at room temperature and warm in the oven for a freshly baked taste.
Frequently Asked Questions
Can I use all-purpose flour?
Yes, but bread flour provides better structure and a chewier crumb.
Why didn’t my bread rise?
Your starter may not have been fully active, or the dough may have been under-proofed.
Can I freeze the dough?
Yes. After shaping, freeze the loaves before proofing. Thaw overnight in the refrigerator, allow them to finish proofing, then bake.
Do I need a Dutch oven?
No. Since these loaves are baked in mini loaf pans, a Dutch oven isn’t necessary. Using steam in the oven during the first part of baking will help create a crisp, artisan-style crust.
How do I know when the bread is done?
The crust should be deep golden brown, and the internal temperature should reach 205–210°F (96–99°C).
Final Thoughts
Mini Sourdough Bread Loaves combine everything people love about artisan sourdough into a convenient, shareable size. Their crisp crust, tender chewy crumb, and rich tangy flavor make them perfect for everyday meals, gifting, or stocking your freezer with homemade bread. While sourdough takes time and patience, the process is simple, rewarding, and well worth the effort. Once you bake your first batch of these beautiful mini loaves, you’ll understand why homemade sourdough is so beloved—and you’ll likely find yourself making them again and again.
Happy Baking! 🍞❤️
