
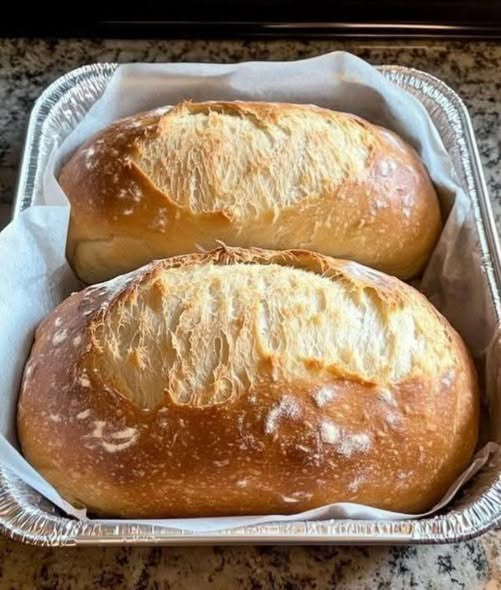
There’s nothing quite like the aroma of freshly baked sourdough bread filling your kitchen. While traditional artisan sourdough is famous for its chewy texture and crisp crust, this Soft & Fluffy Sourdough Sandwich Bread offers a different experience. It has a tender crumb, a light texture, and a beautifully golden crust that makes it perfect for breakfast toast, sandwiches, grilled cheese, French toast, or simply enjoying warm with butter.
This recipe uses an active sourdough starter instead of commercial yeast, allowing the dough to rise naturally while developing rich flavor. The addition of butter and a small amount of honey helps create an incredibly soft loaf that stays fresh for several days.
Whether you’re an experienced baker or just beginning your sourdough journey, this easy recipe will help you bake bakery-quality sandwich bread right at home.
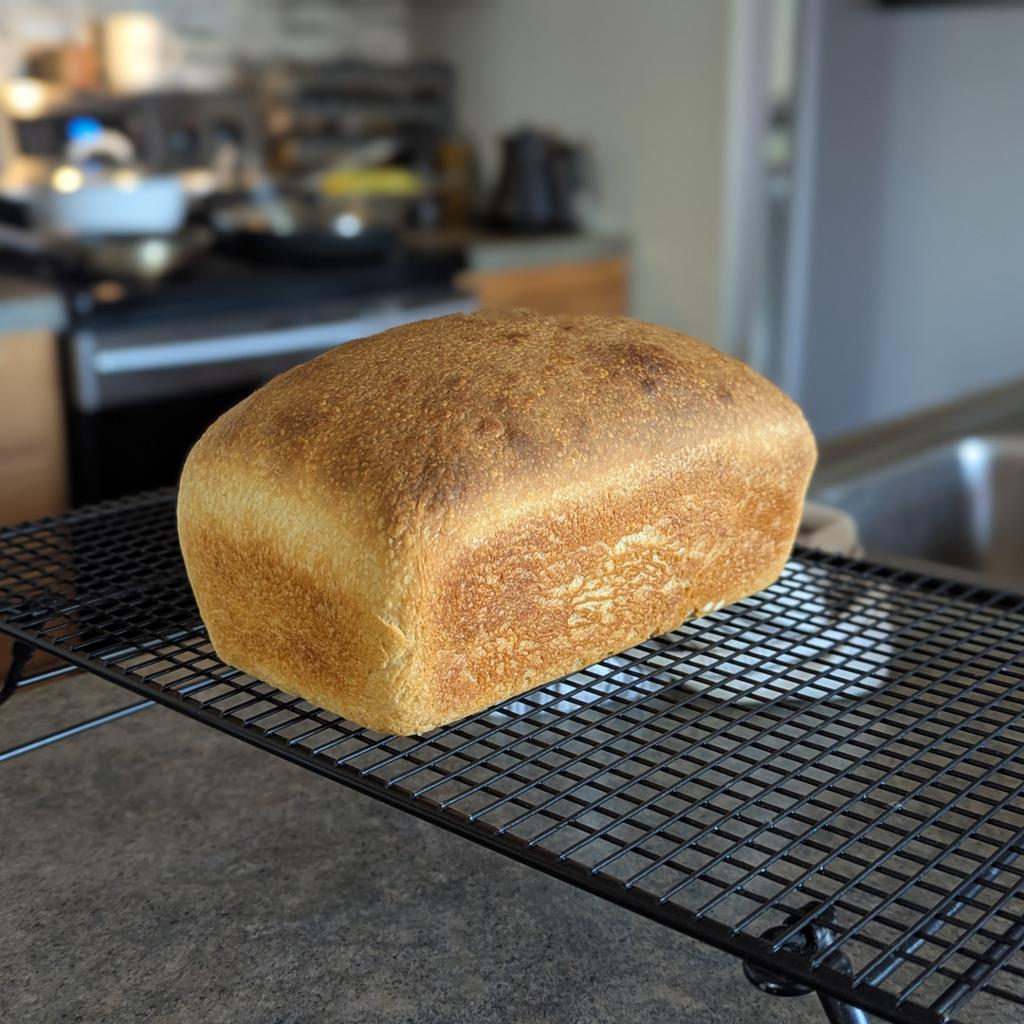
Why You’ll Love This Recipe
- Naturally fermented with sourdough starter
- Soft, fluffy interior
- Beautiful golden crust
- Perfect for toast and sandwiches
- No commercial yeast required
- Freezes well
- Family-friendly recipe
- Great for meal prep
What Makes This Bread Different?
Unlike crusty artisan loaves baked in Dutch ovens, sandwich bread is designed to be softer and easier to slice. The butter, honey, and gentle shaping create a loaf that’s ideal for everyday use.
The result is:
- Thin golden crust
- Light and airy crumb
- Mild sourdough flavor
- Soft slices that don’t crumble
- Excellent texture for sandwiches
Ingredients
- 500g bread flour
- 120g active sourdough starter
- 320ml warm water
- 30g unsalted butter, softened
- 20g honey or sugar
- 10g salt
- 1 tablespoon olive oil
Equipment Needed
- Large mixing bowl
- Kitchen scale
- Dough scraper
- Loaf pans
- Parchment paper
- Sharp bread lame or razor
- Cooling rack
How to Make Soft Sourdough Sandwich Bread
Step 1: Feed Your Starter
Feed your sourdough starter about 4–6 hours before baking.
Your starter is ready when:
- It doubles in size
- Looks bubbly
- Smells pleasantly sour
- Floats in water (optional test)
Using an active starter is the secret to a light and fluffy loaf.
Step 2: Mix the Dough
In a large bowl combine:
- Active starter
- Warm water
- Honey
Mix until smooth.
Add:
- Bread flour
- Salt
Mix until no dry flour remains.
Add softened butter.
Continue mixing until incorporated.
Step 3: Knead
Knead by hand for about 10 minutes.
The dough should become:
- Smooth
- Soft
- Elastic
- Slightly tacky
If using a stand mixer, knead for about 8 minutes on medium speed.
Step 4: Bulk Fermentation
Place the dough into a lightly greased bowl.
Cover.
Let rise for approximately 4–6 hours depending on room temperature.
During the first two hours perform stretch-and-folds every 30 minutes.
This strengthens gluten without excessive kneading.
Step 5: Shape the Dough
Turn the dough onto a lightly floured surface.
Divide into two equal pieces.
Flatten each gently.
Roll tightly into loaves.
Pinch the seams closed.
Place seam-side down into greased loaf pans.
Step 6: Final Proof
Cover with a towel or plastic wrap.
Allow to proof for 2–4 hours.
The dough should rise until it sits just above the edge of the loaf pan.
Avoid over-proofing, which may cause the bread to collapse during baking.
Step 7: Score the Bread
Using a sharp lame or razor blade, make one long slash across the top of each loaf.
Scoring allows the bread to expand properly while baking.
Step 8: Bake
Preheat oven to 375°F (190°C).
Bake for:
35–40 minutes
The loaves should become:
- Deep golden brown
- Crisp on top
- Hollow sounding when tapped
Internal temperature should reach about 200°F (93°C).
Step 9: Cool
Remove bread immediately from the pans.
Cool completely on a wire rack.
Waiting before slicing keeps the crumb soft and prevents gummy texture.
Pro Tips
- Always use bread flour for better structure.
- Keep your starter healthy and active.
- Avoid adding too much extra flour.
- Let the dough ferment naturally.
- Use room-temperature butter.
- Cool completely before slicing.
Storage
Room Temperature:
Store inside a bread bag or airtight container for up to 4 days.
Freezer:
Slice first.
Freeze for up to 3 months.
Toast slices directly from frozen.
Serving Ideas
This bread is delicious with:
- Butter
- Homemade jam
- Peanut butter
- Honey
- Garlic butter
- Avocado
- Grilled cheese
- Egg sandwiches
- Chicken sandwiches
- French toast
Common Mistakes
Dense Bread
Usually caused by an inactive starter or under-proofing.
Sticky Dough
Sourdough is naturally wetter than regular bread dough.
Resist adding too much flour.
Flat Loaf
Most often caused by over-proofing.
Bake as soon as the dough has risen properly.
Thick Crust
Avoid over-baking.
Remove the bread once fully cooked.
Frequently Asked Questions
Can I use all-purpose flour?
Yes, but bread flour produces a taller loaf with a softer crumb.
Can I refrigerate overnight?
Yes. After shaping, refrigerate overnight and bake the following day.
Can I make one loaf?
Simply halve all ingredients.
Can I add seeds?
Absolutely. Sesame, sunflower, flax, or pumpkin seeds work beautifully.
Why is my bread gummy?
It was likely sliced while still warm or slightly under-baked.
Nutrition (Approximate Per Slice)
- Calories: 165
- Carbohydrates: 30g
- Protein: 5g
- Fat: 3g
- Fiber: 1g
- Sugar: 2g
Final Thoughts
Soft Sourdough Sandwich Bread is one of the most rewarding homemade breads you can bake. It combines the rich flavor of natural fermentation with the soft texture that everyone loves. Whether you’re making breakfast toast, packing lunches, or serving warm slices with dinner, this loaf is versatile, delicious, and easy to make.
Once you bake this recipe, you’ll understand why homemade sourdough sandwich bread is a favorite in so many kitchens. With its fluffy crumb, golden crust, and incredible flavor, it’s the perfect everyday bread for the whole family. Enjoy every slice fresh from the oven, toasted with butter, or transformed into your favorite sandwiches.
